

(photo credit: Amanda Buechler )
Hello Friends!
Today I'm going to show you how I make twirl skirts - this tutorial will work in any size and is so easy! If you have any little girls in your life and a yard of fabric calling your name, here's an idea to get you sewing :) There are a ton of tutorials for twirl skirts out there, and basically, I've taken a page from each of them to make my own. For this skirt, I wanted a vintage feel, so I chose this great floral fabric from Heather Bailey and some crochet trim - it turned out adorable!
The amount of fabric you will need to make your skirt really depends on the size you are making. For this skirt to fit my 8 year old, I figured out the size of my pieces like this:
Waistband: hip measurement (23) plus 2 inches for ease = 25 inches wide x 4.5 inches tall.
Skirt: length you want (I went with 14 inches...add 3 inches from the waistband and that's 17 inches from her waist) x width of fabric from selvage to selvage. To make this skirt super twirly, I cut two skirt pieces.
So, my pieces were like this:
Waistband: 25" x 4.5" and (2) 14" x 44".
You will also need 1/2 inch wide elastic an inch longer than the waist circumference and trim (I used a crochet trim from Joann) for the hem. Plus the standards - sewing machine, matching thread, pins, safety pin.
Seam allowances are 1/2 inch, unless otherwise noted.

First, let's make the waistband. Fold your strip of fabric right sides together. Sew them together. Serge or zig-zag or pink edges to finish.
Now, turn the top edge over 1/4 inch and press. Turn over 1 inch and press again.


Next, place your skirt pieces right sides together and sew seams together at the short ends. Serge, zig-zag, or pink edges to finish. Press seams. Now, you can use your preferred gathering method to gather 1 long end of the skirt. I use my serger, but if you don't have one, just set your machine's stitch length to the longest possible, then sew all the way around about 1/4 inch from the edge. Leave a long tail and gently pull the thread on the bottom (the bobin thread). Adjust your gathers so that they are evenly distributed. Make sure that you gather the skirt to be the same width as your waistband.
If you've never gathered with your serger, give it a try! Just adjust the tension in your needles to their highest setting (9 on my machine). Again, leave the thread tail long and adjust the gathers to make them as even as possible, until the skirt reaches the same width as your waistband.

Once your skirt is gathered, turn your waistband right side out, and place inside the skirt, upside down. So, the bottom of your waistband should be even with the edge of your skirt. Be sure to match up the seams. Pin both pieces together.


Sew both pieces together. Serge or zig-zag seam to finish, then press towards the top of the waistband. Turn the skirt right side out and top stitch 1/8" away from the seam.
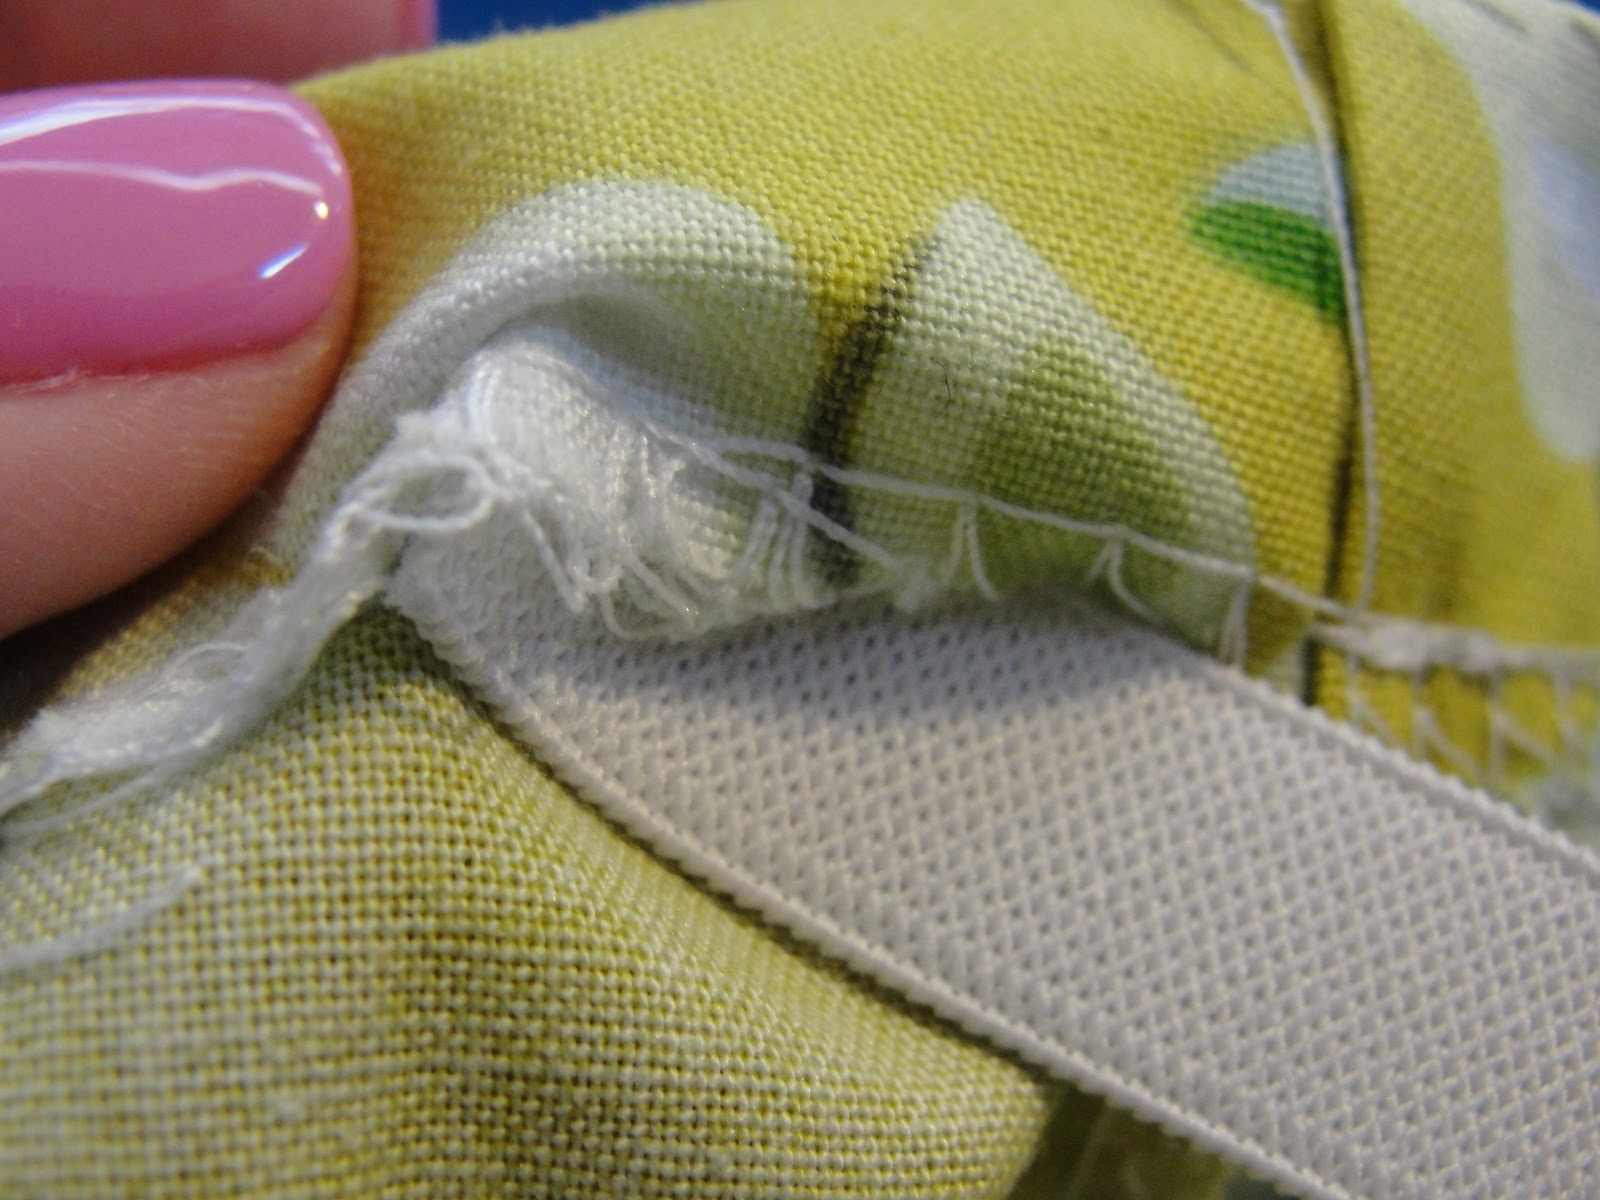
To hem the skirt, either fold 1/4" over and press into place OR serge the edge. Pin the trim to the right side of the hem as shown below.

Sew the trim in place, sewing as close to the edge of the trim as possible. Be sure to fold the edge of the trim over at the end of the seam so that you don't have the raw edge of the trim sticking out!

Now, turn the hem over and press. Voila! Your hem now has some adorable trim hanging off of it!

Now, top stitch the hem into place by stitching 1/8" away from the trim.

Finally, place a safety pin on one end of your elastic, then feed it through the casing. Sew the ends of the elastic together, then sew the casing of the waistband shut.
And there you have it! A sweet little skirt perfect for girls who love to twirl!
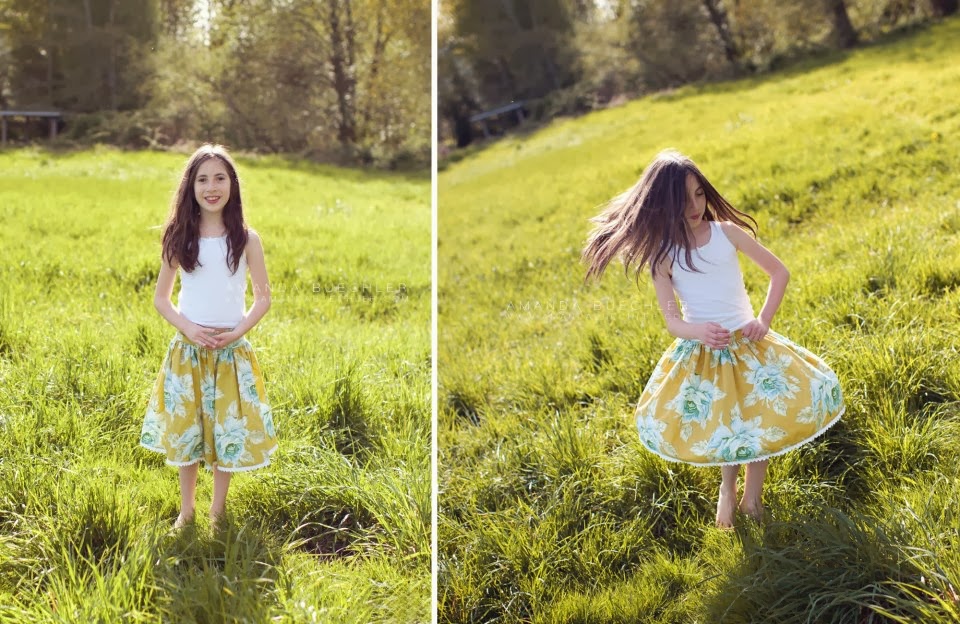
You can make this skirt in any size using the formula above - I've even made it in adult size (although to make it full, I needed about 3 lengths of fabric, so make sure you buy enough!). If you make some, please link back and tell us all about it!
Linking up with these parties:
had to check this out - i have a 4 yr old who LOVES TO TWIRL!! i may have to give this a go . .thanks for sharing!
ReplyDeleteOh, she will LOVE one of these! I started making them when my oldest was about 4. They really are easy enough to make several in an afternoon :) Thanks for the comment!
DeleteWow, my 4yo daughter is a twirl-er too :)
ReplyDeleteAnd I've just taken some vintage trim/laces from my mom's dresser... let's sew :)
Thanks for sharing,
MammaNene
SergerPepper.blogspot.it
Oooh...I hope you come back and share what you make!! Thanks for commenting :)
DeleteThat is a really pretty skirt, I love the fabric choice and the trim! Thanks for the tutorial.
ReplyDeleteThank you, Katie!
DeleteThis is adorable! Thanks for sharing! Just wanted to let you know that you were featured today at my blog Get Your Crap Together!!!
ReplyDeleteThanks for the tutorial! I've been making gathered skirts for ages, but it never occurred to me to make the waistband separately! Much more finished
ReplyDelete