Happy Monday, everyone! After my posts on staying organized and meal planning, I had a lot of requests for my weekly meal plan. So here it is (recipes that I found online included in links!):
Monday
Breakfast: smoothies or cereal
Lunch: leftover chicken legs with rice and broccoli
Dinner: kale, garbanzo, and chicken soup
Tuesday
Breakfast: eggs, toast, fruit
Lunch: turkey wraps, carrots, grapes
Dinner: Butternut and Chorizo Shells and Cheese, roasted veggies
Wednesday
Breakfast: smoothies or cereal
Lunch: sunflower seed butter and jelly sandwiches, apples, raisins, and cucumber slices
Dinner: Slow Cooker Honey Dijon Chicken and Vegetables
Thursday
Breakfast: oatmeal and fruit
Lunch: leftover shells and cheese with apples and carrots
Dinner: Enchilada Noodle Casserole with salad and fruit
Friday
Breakfast: eggs, toast, fruit
Lunch: leftover casserole, apples, cucumber slices
Dinner: baked salmon with red cabbage and potatoes
Saturday
Breakfast: Baked Apple Cinnamon Oatmeal
Lunch: leftovers
Dinner: leftovers
Sunday
Breakfast: Brown Butter Pumpkin Waffles with Brown Butter Buttermilk Syrup (amazing!!!)
Lunch: Buffalo-style cauliflower steaks and salad
Dinner: Beef and Onions Braised in Beer with roasted cauliflower and broccoli on the side
Extras:
pumpkin snickerdoodles, salt and vinegar kale chips, granola bars
What's on your menu this week? Tell me about it in the comments!

Monday, September 30, 2013
Wednesday, September 18, 2013
Meal Planning 101
Even though The Graceful Rose is mainly a sewing blog, I do LOVE to cook. My mom is a trained chef and taught me just about everything I know - especially, the importance of meal planning.
Meal planning is important for several reasons. First, it saves you TIME. How much time do you spend going to the store every day or two? Wondering what you're going to feed your family tonight? Cooking? Second, it saves you MONEY. Convenience foods are not only unhealthy, they are also super expensive. I don't know about you, but feeding just my family of four can cost several hundred dollars a week if we don't meal plan. Finally, it saves you PEACE OF MIND. I mean, really...it's just blissful spending all week knowing exactly what's coming and how to take care of it!
I meal plan breakfast, lunches, snacks, and dinner...but I'm just going to show you dinners here. Baby steps :o)
I already showed you how I stay organized. I'm going to repeat something that I said in that post...what I do might not work for everyone. It works for my family (of non-picky eaters for the most part) who lead fairly busy and active lives. BUT, I really believe that you can make meal planning this way work for just about every family.

First things first...in order to have a meal plan, well, you need meals, right? I get mine from a variety of places...cookbooks (obviously!), magazines, and of course, Pinterest. You can click on the P button in the upper right corner OR here are a few of my food boards for your viewing pleasure :o)
Second, you need to know your schedule for the week. Like I said in this post, I like to plan Monday-Sunday (Sunday night is my planning night). I plan my week and to do lists, and I also plan my meals. I try to fit crock pot or fast meals on nights when we have lessons or practices and save new recipes or complicated dishes for nights when I have more time/energy.
***A word about coupons and grocery store ads*** I don't generally use coupons. Mainly because it's rare that they are for something that I buy. I do check the weekly ads to see if something worth stocking up on is on sale (chicken, pasta, etc.) But generally, I don't take ads or coupons into consideration when I shop.
So, when I sit down with my planner and start thinking about meals, I look at my upcoming week. Right now, my girls are both playing soccer and have practices right before the dinner hour several nights a week. So, those nights I rely on either a crock pot meal or leftovers. For the (rare) nights when we don't have practice or class near dinner, I pick a new recipe or something tried and true that is not to hard to make. Weekends are for something that is more elaborate!
Here's my general formula for the week: 2 crockpot meals, 1 leftover night, 1 new recipe, 2 tried and true, 1 fancier/lengthy recipe.
The next step is something that I think a lot of people forget - ask your family what they want for dinner! I hear from a lot of people that their families are picky...so ASK what they like and try to make something that fits that each week. For example, my kids will eat tacos like they are going out of style, and will eat them in just about every incarnation. So, we have some form of taco (or burrito) every week. My husband Asian cuisine, so I try to add something Asian as well. We all like fish, so we have that once a week too. And don't forget my favorite meal - breakfast for dinner!
It's important to assign your meals to your days. Coming up with a list just doesn't cut it for most busy families. You'll still be scrambling at some point to decide what to make, and that takes too much work!
When you've made your plan, write your grocery list. Don't forget to add things that you've run out of during the week, as well as things for lunches and breakfasts. I do a column for produce, one for meats, one for dairy, and one for the middle of the store. There are a ton of printables out there, and some of them have room for your meal plan AND your grocery list - easy peasy!
Finally, if your family is anything like mine, they are constantly asking, "What's for breakfast/lunch/dinner?" I got this great meal plan decal from the Martha Stewart Line at Staples...I think it was about $10. I don't see it on their website, but there were several at my local Staples last week, so I know they are still in production.

Sorry...I never realized that I write like a 3rd grader!
Anyway, you can see the plan for morning, noon, and night, and I put the snacks I plan to make in that little side box. I really like the tablet it comes with to list what we're out of - my husband and 3rd grader already know to write things down when we run out.
To wrap up, here are the key things that I think are important in meal planning:
- Make sure you plan your meals to fit your week! Don't plan a detailed dinner on a night when both kids have soccer practice at the same time on different fields...keep it simple!
- Write your grocery list at the same time as you meal plan - and don't forget to add the things you ran out of last week.
- Get your family involved! You're feeding more than yourself, so ask what they want! It helps stave off the "I don't like this!" if they feel that they have a choice in picking what they are eating.
- Post your menu somewhere in your kitchen. It will help keep you on track, and it will help your family know what to expect. And maybe it will help your spouse know that he or she can help you out ;-)
Tuesday, September 17, 2013
Tried and Tested: Apple Loungewear by Shwin and Shwin
Whew - after having a week of weather in the 80s and 90s, we've gone back to good ole' Seattle rain and grey skies. It's starting to feel like fall for sure! My favorite thing about fall (well, besides pumpkin flavored everything!) is comfort - comfort food, snuggling up on the couch with a comfy blanket, and of course, comfy clothes. Sometimes, a girl just wants to throw on her leggings and an oversized sweatshirt and relax! The Apple Loungewear set by Shwin and Shwin Designs is perfect for that!
This is another pattern from Shwin & Shwin's fall line - definitely check the whole line out because it's all adorable and super comfy!


My oldest LOVES this outfit and has worn it 4 times in the week since I sewed it up...that says a lot, right? She loves comfy clothes, but as I mentioned in my Paperback Writer review, she's getting older and to the point where she wants to look cute and stylish. This set is really perfect for that!

I chose to make the hi-lo version and add the side pockets - perfect to keep hands warm or store tiny treasures. I used a velvety soft velour from Hobby Lobby. It's from their fall line and is on sale right now, too! Go get some! I used soft black ribbing for the neckline, hem, and cuffs, and then just a black cotton jersey for the leggings.

As you can see, the top is oversized - lots of length and width for maximum comfort! The whole outfit came together in about 2 hours, and the directions were really clear and easy. I think this is a great pattern for someone who has sewn with knits, but would like to get more adventurous.
The size 8 is pretty true to size in terms of length and width - just remember that the top is oversized for a reason ;-)
The Details:
Pattern: Apple Loungewear by Shwin and Shwin
Size tested: 8
Fabric used: cotton knits from Hobby Lobby
Overall thoughts: Very good instructions, easy to follow. Good pattern for an advanced beginner, especially someone new to knits, as there are some great tips.
This is another pattern from Shwin & Shwin's fall line - definitely check the whole line out because it's all adorable and super comfy!

The Apple Loungewear Pattern is two pieces - leggings with a fold-over waistband, and an oversized sweatshirt that has some cute options to really make it fun. I love when basics come with options - it adds more style!

My oldest LOVES this outfit and has worn it 4 times in the week since I sewed it up...that says a lot, right? She loves comfy clothes, but as I mentioned in my Paperback Writer review, she's getting older and to the point where she wants to look cute and stylish. This set is really perfect for that!

I chose to make the hi-lo version and add the side pockets - perfect to keep hands warm or store tiny treasures. I used a velvety soft velour from Hobby Lobby. It's from their fall line and is on sale right now, too! Go get some! I used soft black ribbing for the neckline, hem, and cuffs, and then just a black cotton jersey for the leggings.

As you can see, the top is oversized - lots of length and width for maximum comfort! The whole outfit came together in about 2 hours, and the directions were really clear and easy. I think this is a great pattern for someone who has sewn with knits, but would like to get more adventurous.
The size 8 is pretty true to size in terms of length and width - just remember that the top is oversized for a reason ;-)
The Details:
Pattern: Apple Loungewear by Shwin and Shwin
Size tested: 8
Fabric used: cotton knits from Hobby Lobby
Overall thoughts: Very good instructions, easy to follow. Good pattern for an advanced beginner, especially someone new to knits, as there are some great tips.
Friday, September 13, 2013
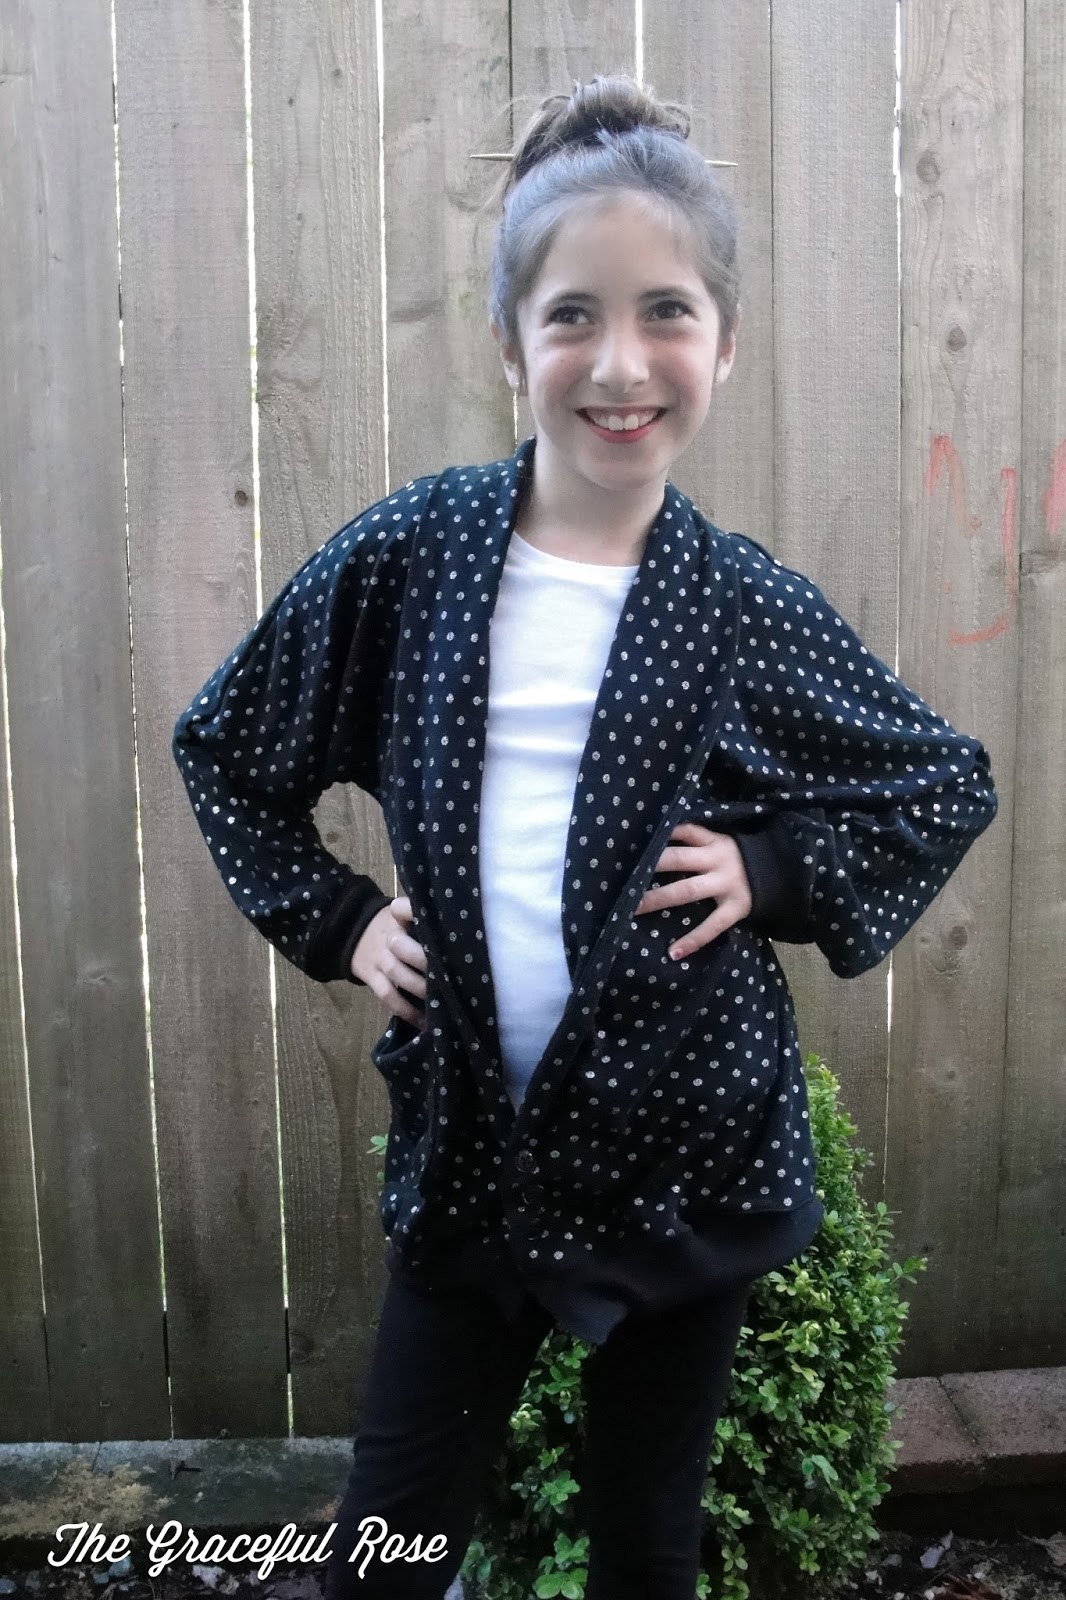
Tried and Tested: Paperback Write Cardigan by Shwin & Shwin Designs
So, there comes a time in a third grader's life where she realizes...she's just not that into some of the "little girl" things that she used to be. She's moving on to bigger and better stuff...more mature stuff. Particularly in the fashion department. Yep, folks, we've moved into the tween years. *sniff*
So, when the awesome Shauna of Shwin & Shwin asked me to test this cute little Paperback Writer Cardigan, I knew which size to choose - the one of my mature tween.

The styling on this cardigan is slouchy and relaxed, and according to my daughter, "Super crazy comfy!" Which I guess means she loves it.

The shawl collar and optional pocket give it really cute style. I've got one cut out for my 6 year old with a contrasting collar and trim, which I think will be really fun!


So, when the awesome Shauna of Shwin & Shwin asked me to test this cute little Paperback Writer Cardigan, I knew which size to choose - the one of my mature tween.
The styling on this cardigan is slouchy and relaxed, and according to my daughter, "Super crazy comfy!" Which I guess means she loves it.

The shawl collar and optional pocket give it really cute style. I've got one cut out for my 6 year old with a contrasting collar and trim, which I think will be really fun!

As you can see, the Paperback Writer looks great with leggings (yep, another pattern review, which will be out soon!), but I think it would also look great with some skinny jeans and boots.
I made this version with a really soft sweater knit from Joann. I thought the silver dots on the black background were great for a younger kid, but also mature enough for someone older and more worldly. Ahem.
The best news: Shauna is working on an ADULT version of this pattern! Hurrah! Really, the size 8 just about fit me, aside from needing to lengthen the arms a tad. But for those of you who are not vertically challenged like myself, just be patient and wait a few weeks for the grown up version ;-).
I'm going to offer these in the shop as well - so if you'd like your own, please let me know!
The Details:
Size Tested: 8
Fabric Used: black with silver polka dots from Joann's fall fashion line. This fabric has a great drape and was the perfect choice.
Verdict: The slouchy style is adorable on younger kids, but perfect for older kids! This pattern came together really quickly - the instructions are great and very detailed.
Thursday, September 12, 2013
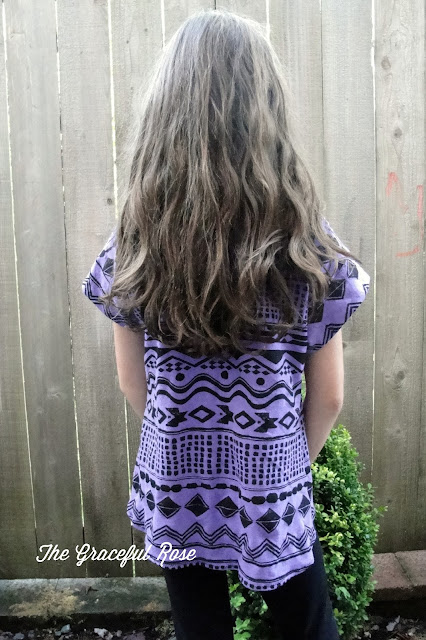
Tested and Reviewed: The Viewfinder Tee by See Kate Sew
I've been busy as a bee with back to school sewing, including testing 3 patterns, and I get to share 1 with you today!
If you read sewing blogs, then of course, you know the lovely Kate from See Kate Sew. She's got great style and I just love her annual Ruffle Series! You should definitely check the ruffle apron from this year out - so adorable :) Kate just released a new pattern collection - the Nostalgia Collection - and I got to test the Viewfinder Tee.


I made this first version out of a pretty thick knit with sort of a floral lace print on it - my daughter helped me pick the fabric and thought it was perfect for a big girl. This fabric is from Joann's fall line and is SO soft!

I love the wider neckline, and the sleeves are about as easy as can be - in fact, this whole shirt can be made in less than an hour, including cutting! If you've never sewn with knits before, this is a great place to start - only 4 pattern pieces and NO serger required :)

It looks great with some skinny jeans and boots for fall, but would be perfect for summer with some shorts. Best of all - it only takes 2/3 of a yard of fabric for a size 8! I plan on making a ton - it's such a great pattern!

I made this version with some tribal print from Girl Charlee. I bought this a while ago, so it looks like they are out of stock, but they do have a few other tribal prints (and hello - their prices are amazing!!).

I love the way it looks with leggings (more on that pattern test soon!), and of course, this was approved by my little model as "The Most Comfy Outfit EVER!" Gold Star for Mama :)
If you read sewing blogs, then of course, you know the lovely Kate from See Kate Sew. She's got great style and I just love her annual Ruffle Series! You should definitely check the ruffle apron from this year out - so adorable :) Kate just released a new pattern collection - the Nostalgia Collection - and I got to test the Viewfinder Tee.
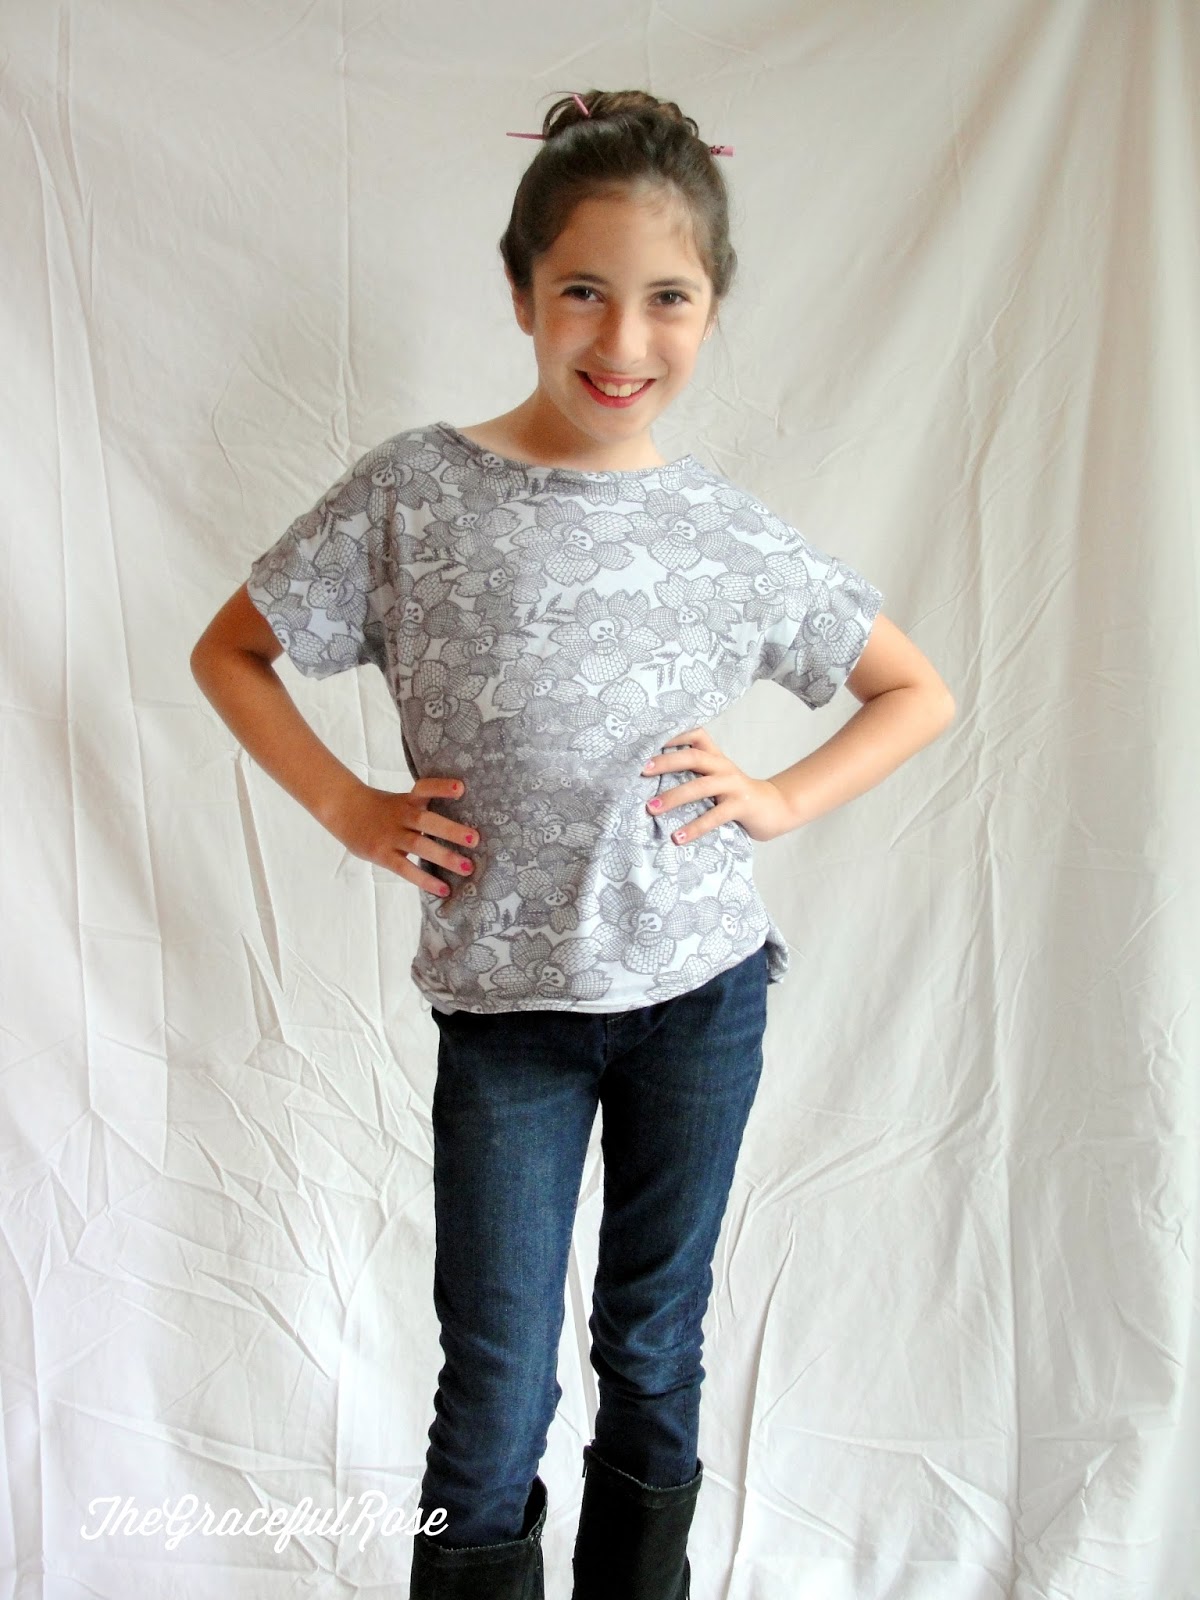
The Viewfinder Tee is a dolman sleeved tee with a hi-lo hemline. I made a few in a size 8 and they fit my slender 8 year old just perfectly. 
I made this first version out of a pretty thick knit with sort of a floral lace print on it - my daughter helped me pick the fabric and thought it was perfect for a big girl. This fabric is from Joann's fall line and is SO soft!

I love the wider neckline, and the sleeves are about as easy as can be - in fact, this whole shirt can be made in less than an hour, including cutting! If you've never sewn with knits before, this is a great place to start - only 4 pattern pieces and NO serger required :)

It looks great with some skinny jeans and boots for fall, but would be perfect for summer with some shorts. Best of all - it only takes 2/3 of a yard of fabric for a size 8! I plan on making a ton - it's such a great pattern!

I made this version with some tribal print from Girl Charlee. I bought this a while ago, so it looks like they are out of stock, but they do have a few other tribal prints (and hello - their prices are amazing!!).

I love the way it looks with leggings (more on that pattern test soon!), and of course, this was approved by my little model as "The Most Comfy Outfit EVER!" Gold Star for Mama :)

The Viewfinder Tee pattern is for sizes 9/12M-8. You can purchase it here, or as part of the Nostalgia Collection here.
Thanks, Kate, for letting me test such a great pattern!
The Details:
Pattern: Viewfinder Tee by See Kate Sew
Size Tested: 8
Fabric Used: a thick interlock from Joann, and a thin tee shirt material from Girl Charlee.
Tuesday, September 10, 2013
Fall Bark aka The Easiest Dessert You'll Ever Make
I'll admit...I've had a not so good week.
Sometimes, you just need to "bake" away the stress, know what I mean?
Something sweet and salty...and crunchy...yum.
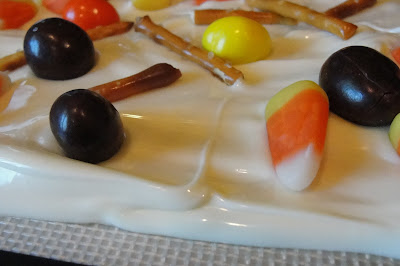
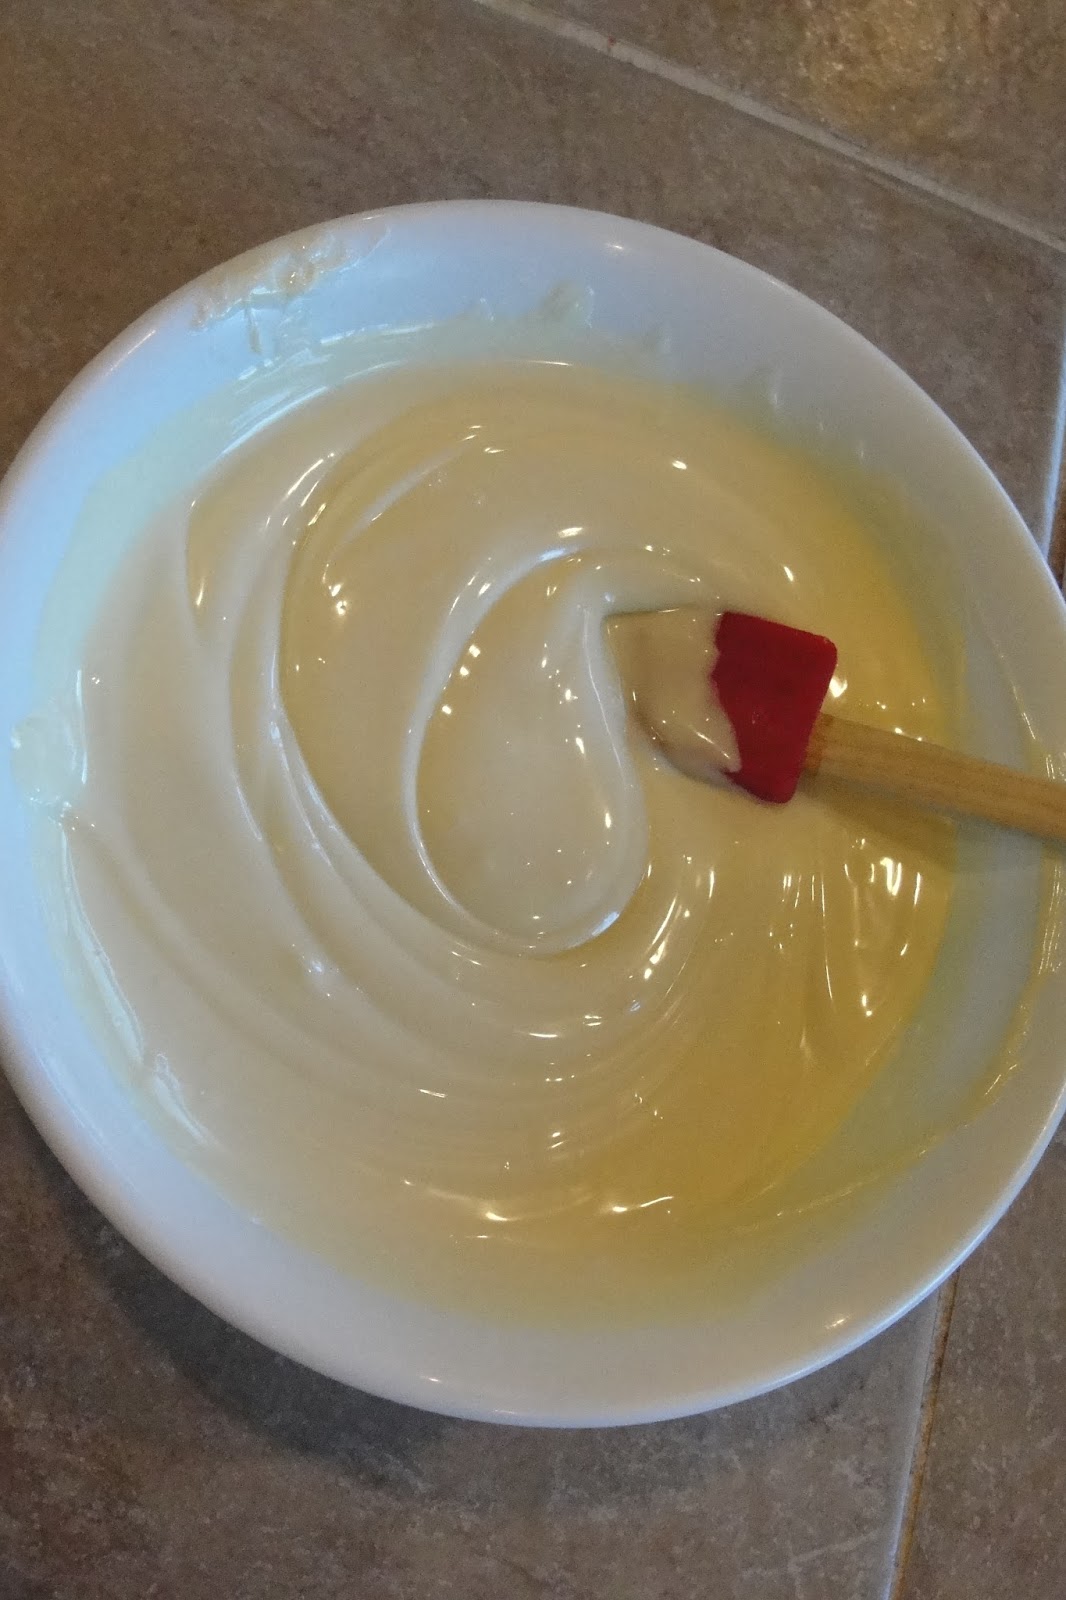
And easy. It's gotta be easy! Hence: Fall Bark:

The Cast of Characters:


Next, spread that melted chocolate out into a rectangle. I put mine down on a silicone baking mat, but parchment or wax paper would work, too.

After that, sprinkle on your toppings! And maybe save a few peanut M&Ms for yourself...


Make some and enjoy!

Sometimes, you just need to "bake" away the stress, know what I mean?
Something sweet and salty...and crunchy...yum.
And easy. It's gotta be easy! Hence: Fall Bark:

The Cast of Characters:

White Chocolate Chips (I used one bag, but by all means...double up if you want to!)
Handful of Candy Corn
Handful of Peanut M & Ms
Handful of broken up Pretzels...basically, I used what was left at the bottom of the bag ;-)
First, melt your chocolate...it took about 90 seconds in my microwave. You'll want to use 30 second blasts and stir in between so you don't burn the chocolate.
Next, spread that melted chocolate out into a rectangle. I put mine down on a silicone baking mat, but parchment or wax paper would work, too.

After that, sprinkle on your toppings! And maybe save a few peanut M&Ms for yourself...

Now, press all of the toppings in...that way when your bark dries, they won't fall off. Walk away and let it all harden...it took about 30 minutes for mine. If you're impatient, put it in the freezer!

When it's hardened, just break it apart. And maybe snack on some...
It's salty, sweet, crunchy, and creamy...basically, the perfect cure for a yucky day.

Make some and enjoy!

Monday, September 9, 2013
How I Stay Organized

Are your kids back to school too? Last week was our first week (well, three days) back and it was blissful yet super busy. Between running a business, taxi-ing kids back and forth to various lessons and practices, serving on our school's PTSA board, leading a Girl Scout troop...yeah, it takes a lot of time. But more importantly, it takes a lot of practice! A few of my friends have kids younger than mine, so they were just starting preschool or kindergarten last week and I got asked more than once how I stay organized. Well, here you go!

First, let me say that what works for our little family might not work for yours. I only have two kids and we limit the amount of activities that they are involved in (saves money and headaches!). I'm also lucky that my husband works from home a few days a week, so if need be, I can miss the school bus and run to my own meetings since I know he'll be here to get/drop off the kids.
Second, contrary to what I have seen on a lot of organizing blogs in blogland...you do NOT need to invest hundreds of dollars in planners, pens, stickies, etc. A binder and some paper is really all you need. Anything else is just gravy.
Third, I will say that I owe a lot of my organization methods to my mom. She taught me how to meal plan and prioritize and of course, love lists.
Speaking of lists, I'm someone who just NEEDS to write stuff down. I know a lot of people who love Google Calendar and Cozi and the like, but those don't work for me. If I don't write it down...it never happens!
OK, ready to get started?

In the past, I had a notebook for just about everything - meal planning, home maintenance, to do lists, etc. I kept losing my notebooks and realized that method really just didn't work for me. I decided that it would be easier to just have ONE main planner, and I chose to use a binder. I've combined IHeartOrganizing's Home Binder Kit and 2013-2014 Planner into one awesome binder that pretty much does everything I need it to. Jen sells most everything that is in her Home Binder individually...so check out the contents and decide if you need the whole kit and caboodle or if just a few sections will work for you.

I printed my planner and binder out at home, but you can get it printed (and even spiral bound at a place like Staples or Kinkos).
So how to I use it?
Sunday nights, I get my binder, my pen, some highlighters, some stickies and washi tape, and get to planning. First, I look at the upcoming week to see what's on the docket. Doctor appointments, practices, 1/2 days at school, etc. Then I plan my weekly menu around that. My girls are both in soccer in the early evenings, so I've found that crock pot meals work best on those days. I have a lot of meetings for PTA and Girl Scouts around bedtime, so I try to plan quick meals for those nights so that I don't have to spend all evening in the kitchen making a huge mess for my husband to clean up (thanks, Honey!). We keep it simple for breakfasts (smoothies with muffins or quick bread, oatmeal, and eggs with bacon or sausages and toast) and I use Pinterest for lunchbox ideas.
After I meal plan, I write the meals in my planner using the planner pages and also the meal planning page that comes with the family binder. My whole family is constantly asking "What's for Dinner/Lunch/Breakfast?" and this is an easy way to have them figure it out on their own ;-) Next comes the grocery list. I use the inventory printables from IHO to keep track of what I've got and what I'm out of.
When I'm finished meal planning, I make my to do list...I like to assign several tasks to each day. If you need some good basics for a daily to do list, FlyLady is great. I use her basic cleaning routine and weekly schedule and it's worked for several years!
During the day, I keep my planner open and on my desk so that I can check things off (YAY!) or add things as needed. I try to keep my supplies near my binder at all times. I like using highlighters (one color for each person in my family), and I like washi tape for day long or several day activities (vacations, family visits, etc.). Sticky notes are used when I run out of writing space or if there is something I need to move in the future. I get just about everything at Target...you really don't have to spend a ton of money on supplies - the binder, dividers, pens, stickies, and tape were around $10 for the whole shebang.

So that's it! The two keys are to designate a little time every week to plan, and then to check things off and reasses
Subscribe to:
Posts (Atom)