Congratulations to Liz! She said:
"We bake tea rings for friends and family. I have been making these as
long as I can remember with my mom, now I make them with my kids. It
wouldn't be Christmas without them!"
Liz, I'll be emailing you so I can get your infinity scarf to you soon!
Thanks for entering, everyone!

Saturday, December 14, 2013
Tuesday, December 10, 2013
Onesie Dress Tutorial

What you'll need:
- a onesie
- 1/4 yard of fabric for each ruffle layer (I did 3 here)
- 1/4 yard of fabric for the sash
- rotary cutter, clear ruler, and self healing mat
- sewing stuff - sewing machine, needles, matching thread, pins, etc.
Next, determine how long you want the hem of the dress to be. This onesie is an 18-24 month size, and I knew I wanted the hem to be about 6 inches from the bum. Then determine where you want your skirt to start. Add two inches for the sash. For me, I measured from just below the buttons shown on the onesie below.
Now divide that number by 3. That will give you the length of your top ruffles. Because the bottom two ruffles will be sewn right on top of each other and just above the leg band, you want to double the length. For example, my top two ruffles were 5 inches long, so I cut my 3rd ruffle 10 inches long.

When you've determined your length, cut strips selvage to selvage with your rotary cutter and ruler. Next, cut 2 pieces of your sash fabric that are 5 inches long, selvage to selvage.

With right sides together, sew each layer along the short edge. I usually use a 3/8 seam allowance for clothing. Serge or zig-zag the edges.
Now, hem your ruffles. You can either do this by turning the edge under 1/4 inch and then again 1/2 inch and topstitching down, or you can put a rolled edge hem with a serger. I chose to serge, but if you don't own a serger, a traditional hem is just fine. Once all of your ruffles are hemmed, it's time to actually ruffle them! Again, I did this with my serger (just turn the tension on the needles up as high as it will go) or do it with your sewing machine. Place two rows of stitches at 1/8 inch and 1/4 inch using your longest stitch length along the unhemmed edge of your ruffle. Don't backstitch! Pull the bobbin (bottom) threads at each end and gather until your ruffle fits neatly around your onesie.
Now let's get those ruffles sewn in place! First, pin the bottom and middle layer right on top of each other just about the legbands of the onesie. Sew both layers to the onesie at the same time.


Now, add your last layer. Sew that one in place too.

For the sash, sew both pieces together at one of the short ends with right sides together. You should have one long piece. Fold it in half lengthwise with right sides together, and sew along the long edge and one short edge so that you have a tube with only one open end.

Turn the tube right side out (I use these awesome tube turners) and press. Turn edges under 1/4 inch on the open end. Top stitch all the way around.

And voila! You can tack the sash down if you like, or leave it as is. Add a fabric flower or other embellishment, and your little girl is ready to party!

I hope you make a onesie dress soon! Thanks for visiting!
Monday, December 9, 2013
Giveaway Day! - CLOSED
It's one of my favorite times of year - Sew, Mama, Sew!'s Giveaway Day! This year, I am giving away the Infinity Scarf with Flower Cuff that I made for my guest post on The Cottage Mama!

This scarf is sized to fit a child or small adult, and is made of super soft flannel. You can see it below on my 8 year old for sizing:

The flower on the cuff is removable - you can pin it to a sweater, hat, purse, whatever!

This item is only available to ship to US residents (sorry, international readers!).
Monday, November 25, 2013
Guest Post - Organizing a Holiday Recipe Binder
Are you ready for Thanksgiving? For me, figuring out what to serve is always the hardest part. Today I'm sharing my method for creating a Holiday Recipe Binder at Get Your Crap Together.

Chelsea has some great bloggers sharing their tips and tricks to stay organized for the holiday season, so be sure to check them out!


Chelsea has some great bloggers sharing their tips and tricks to stay organized for the holiday season, so be sure to check them out!
Friday, November 15, 2013
Play Frock and Book Review

You guys know how much I love the Cottage Mama's patterns. I've had the pleasure of testing for her several times, and recently got to share my own tutorial on her blog. So of course, when she told her testers that she was coming out with a book, well I just had to purchase it! And I'm so glad that I did!
Sew Classic Clothing for Girls is full of classic patterns with some modern twists. I really love the way that Lindsay shows you how to customize your clothing to make something truly unique. The coat is next on my list, and I can't wait to make some of the capris when the weather is warmer. There are also some adorable accessories to make - so much fun!
All of the patterns in the book are on a disc as PDFs, so you only need to print what you want.

I used my method for working with PDF patterns and it worked great - no reprinting in the future!

I made the Play Frock in a size 6, and from cutting to completion, it only took about 2 hours. The instructions are clear, and I could have customized this dress so many ways!

I used Poetica by Art Gallery Fabrics (purchased here). If you haven't sewn clothing with Art Gallery fabric yet, do it soon! It's not at all like any other quilting cotton. It's light and airy, almost like a voile. The floaty drape is perfect for dresses.

My 6 year old picked out the fabric herself (can you tell she likes pink?), which was fun for both of us. She usually has pretty good taste and is great at picking fabrics that actually coordinate.

I chose to make some fabric covered buttons - I just love the detail that they add!

The bodice is my favorite part. My daughter chose the placket option and I'm so glad that she did - it's so cute!

So, if you have any little girls in your life, go pick Sew Classic Clothes for Girls! The sizes go up to a 10, so you'll be sewing classic clothing for a long time!
**this post contains affiliate links**
Thursday, November 14, 2013
Gold Glitter Fall Bunting - Tutorial
disclaimer: this post contains affiliate links
Happy Thursday! I've got a tutorial for a glittery shabby chic bunting for you today!
What you'll need:

- 3 yards of glitter ribbon (I got mine at a local scrapbook store, but you can buy it online here)
- 1/4 yard of burlap
- scraps of lace (I had about 1/8 of a yard)
- scissors or rotary cutter and mat
- Clear ruler
- pins
- sewing machine and thread OR hot glue gun
When all of your triangles are cut, start layering the burlap and lace triangles together, and pin in the center. This will make it easier to sew or glue! I put my lace layer just below the top edge of my burlap layer, but you could line them up equally if you like.
Now, add the widths of your triangles together, then subtract that from the length of your ribbon. Divide the remainder by 2, and that's how much ribbon you want to leave before you add your first triangle. My ribbon was 108 inches and my triangles were 90 inches total. So, 108-90=18, 18/2=9. So I left 9 inches of ribbon on each end. Mark the space with a pin and then place the ribbon about and inch from the top. Start sewing! Make sure to back stitch. If you don't have a sewing machine, just put down some hot glue and lay the ribbon on top.

Continue placing the triangles side by side with as much or as little space between them as you like.

Voila! A glittery bunting perfect for your Thanksgiving dinner party! I hung mine above my entry table and love the way it adds a little sparkle.

If you haven't made yourself a bunting yet, they really are so simple!

Stay tuned for some more Thanksgiving ideas coming soon!
Tuesday, November 5, 2013
Guest Posting on The Cottage Mama

The fabulous Lindsay, aka, The Cottage Mama, has asked me to share a tutorial today - so head on over to her blog to check it out!
Thursday, October 31, 2013
Boo!
If your school is like ours, and it sounds like more and more are these days, your kids can't wear their costumes to school on Halloween. Our school has several excuses, and to me, they are all pretty weak. But, rules are rules, right? So how's a girl supposed to show her spooky spirit? Skirts!

I whipped up these skirts at the eleventh hour using my 20 Minute Skirt Tutorial...so easy! I just love this fabric! It's Costume Clubhouse by Riley Blake. The stripes are Robert Kaufman.

These skirts really do only take 20 minutes from cutting to wearing - I made them both while my girls were in the shower!

I used Too Cute To Spook by Riley Blake for this one - the dots are from that line as well. Of course, no Halloween outfit would be complete without hot pink cow girl boots!

And there you have it - two super fast, super cute little skirts, perfect for Halloween at a no-costume school!

No candy for me - I have these sweet little things to nibble on later :D Happy Halloween!
Wednesday, October 30, 2013
Spooky Outfits - Last Minute Halloween Outift Ideas
Well, I guess you can say that I got my second Kids' Clothing Week wind! Better late than never, right? A costume, and now these little outfits too!
For my oldest, I just added some ruffles to an existing t shirt. I used a piece of ribbing as the base, and just sewed the ruffle rows right on. It's perfect with leggings, and I think it will still fit next year!

I used my super fast rolled edge hem on the ruffles - the whole thing took less than an hour including cutting time! Easy peasy :)

For my little one, I made a ruffle skirt, again using knit as the base, but more in line with this tutorial. Which, by the way, is fabulous - I've made several and they turn out so cute!


Stay tuned for a few more spooky outfits tomorrow!
For my oldest, I just added some ruffles to an existing t shirt. I used a piece of ribbing as the base, and just sewed the ruffle rows right on. It's perfect with leggings, and I think it will still fit next year!

I used my super fast rolled edge hem on the ruffles - the whole thing took less than an hour including cutting time! Easy peasy :)

For my little one, I made a ruffle skirt, again using knit as the base, but more in line with this tutorial. Which, by the way, is fabulous - I've made several and they turn out so cute!

This girl LOVES ruffles, so I made sure to make it "super poofy" per her request. She picked that witch fabric out herself - the witches are sewing and knitting, which she thought was just hilarious.

Stay tuned for a few more spooky outfits tomorrow!
Tuesday, October 29, 2013
Hey There Little Red Riding Hood - simple costume idea
Are your kids excited for Halloween? I know mine are! While my oldest is recycling a witch costume from a few years ago, my littlest told me that she wanted to be Little Red Riding Hood, so how could I resist?!

This was a super simple costume to put together, and only took about a yard and a half of fabric. I used Dana's awesome circle skirt tutorial for the skirt, which I just hemmed with a rolled edge on my serger. Paired with a long sleeved white t shirt, she can wear both pieces again. She loves the skirt as it has major twirl factor :D

To make the hood, I cut two hood pieces using an existing pattern, then cut a circle using the same method as I used on the skirt. I just cut down the middle so that it opened in the front, did some narrow seams on the edges, and gathered the neckline a bit so that it was the same size as the hood. Same rolled edge hem and some ribbon ties, and voila! A little red hood.

Of course, Little Red needs her spooky ghost earrings on her trip to grandmother's house ;-)

My little one has already asked me to sew an S on the back of this after Halloween so that it can become a super hero cape - she's a girly girl, but she does love her super heroes!
What are your kiddos dressing up as for Halloween? Did you make their costumes?
Wednesday, October 23, 2013
KCW - what I'm sewing this week (so far!)
Well hello, there! It's been a bit since I've been here - long story boring: too many commitments literally made me sick. Ugh. Note to self: SAY NO MORE OFTEN. But, that's all over (for now), and I can finally get on to my (huge) stack of clothes that have been cut and not sewn together.
It so happens that it's Kids' Clothing Week too! I just love when everything falls into place!
First up, this adorable Daphne Wrap for my 6 year old. I just love The Cottage Mama's patterns - she has a great eye for detail and her patterns are incredibly well written. I tested this pattern last spring and have made several for other people, but none for my own girls. I fell in love with this hounds tooth corduroy (I think it was a Hancock purchase), and thought it would be fun for a fall version of the Daphne. I lined it with soft pink flannel and made some covered buttons with the flannel too. So cute - I love how it turned out!


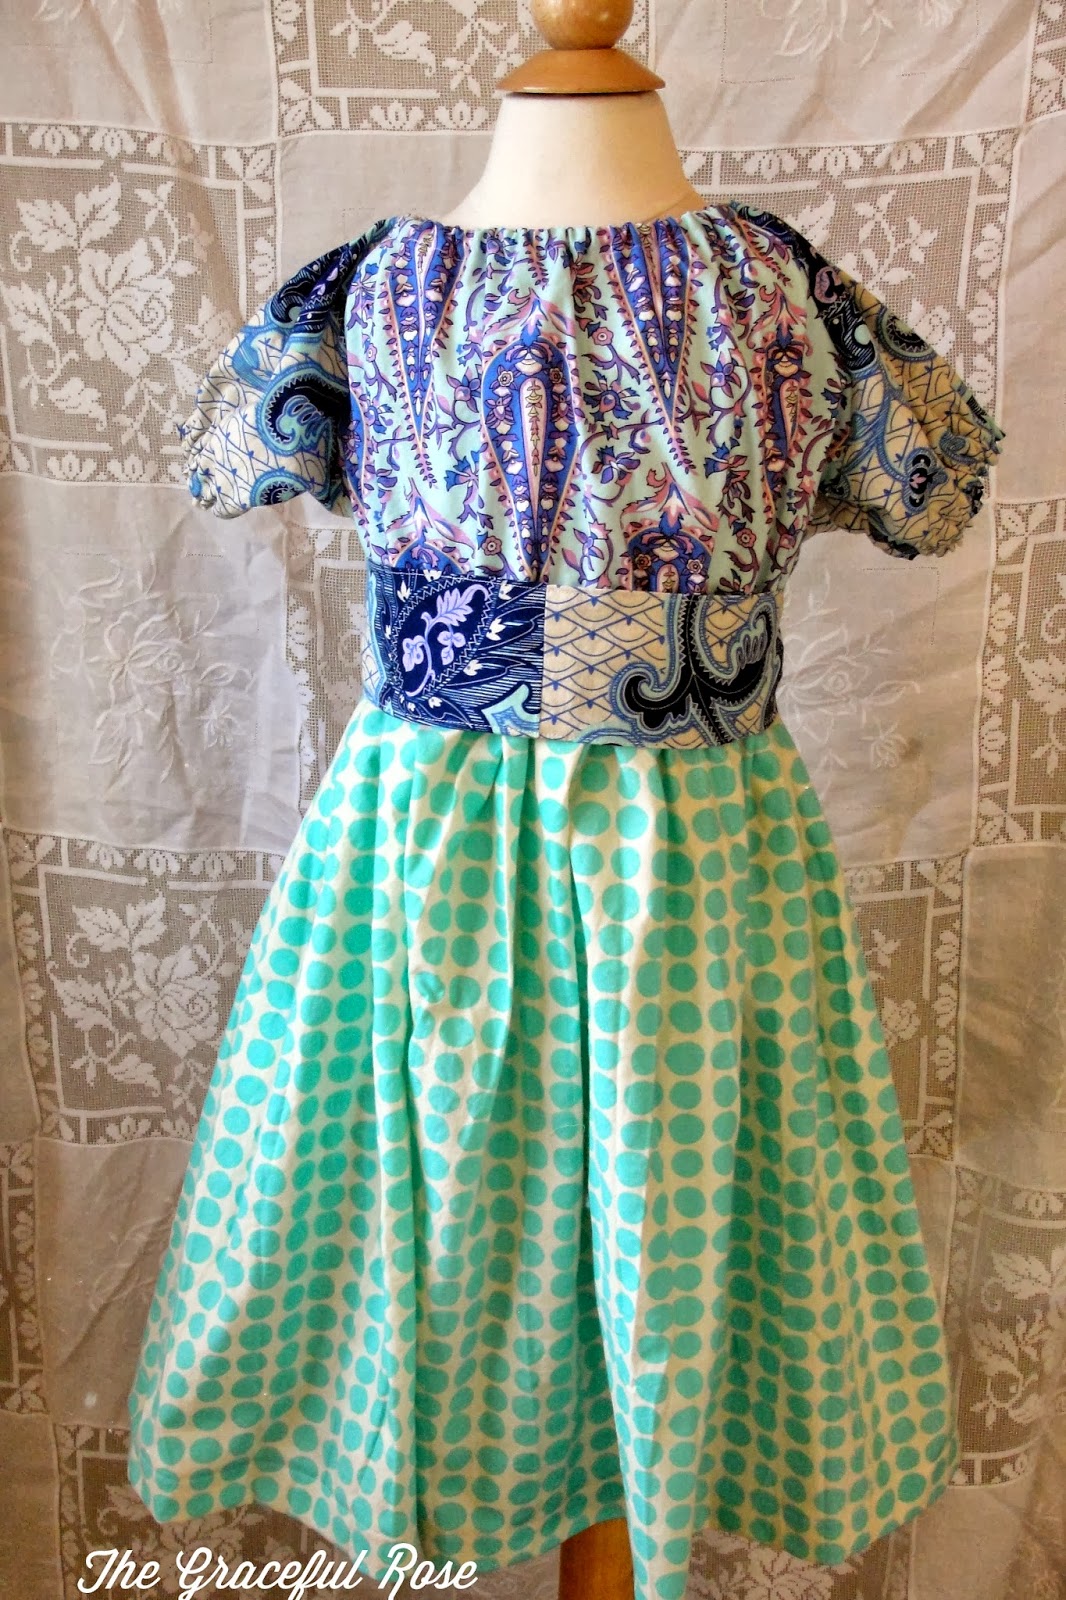
I also made my 6 year old this Perfect Peasant Dress by Peek A Boo Pattern Shop (affiliate link). This is truly one of my favorite patterns! So quick to sew, and super easy. Amy is working on adding long sleeves and also making the pattern go up to a 12 - hurray! My girls love the comfort of a peasant dress, and I love the fit of this one. It makes a great nightgown too! I used a few Amy Butler prints from the Love line, which I think were purchased at a local quilt shop. My daughter picked the fabric combo out herself - love when she helps me design!


Next up is the first of several BBC Vests that I have cut out. This one is for my 8 year old - she has been wanting to get away from "little girl" clothes and more into tween-type clothes, and this vest is perfect. I used a polka dot cotton (sorry, can't remember when I bought it!) for the outside, and lined it with warm flannel. The best part of this vest is the little peplum - instead of pleats, I just did a ruffle in the back. So cute!


Finally, I made this cute little Every Little Thing tunic for my youngest - again, she picked out the fabric (I think she has a thing for Amy Butler!). This little number took me all of an hour to cut and sew together - it was that fast! I love the bow detail in the front. Shauna is adding some sizes to this pattern and I can't wait to get the bigger sizes. This is a wardrobe staple for sure.


And yes, I now have a kid-sized mannequin as my model. My kids are gone at school while the sun is out (and I mean, the sun is only out here in Seattle every so often!), so I need to take my pictures while I have the chance! I have named her Henrietta :) She doesn't complain and doesn't require bribes of candy - win!
Be sure to check out the KCW blog to see what other folks are sewing for their kiddos, too!
Subscribe to:
Posts (Atom)